These are the ASP Ultra Cuff Model 600 Rigid Transport handcuffs. These have the blue high security mechanism which uses a special key (normal keys can be modified to work with them).
These rigid handcuffs are very nice. The most comfortable of all rigid handcuffs I have tried. They have great features like rounded edges, keyhole activated access to the double lock activation and they can fit a larger size wrist compared to conventional handcuffs.
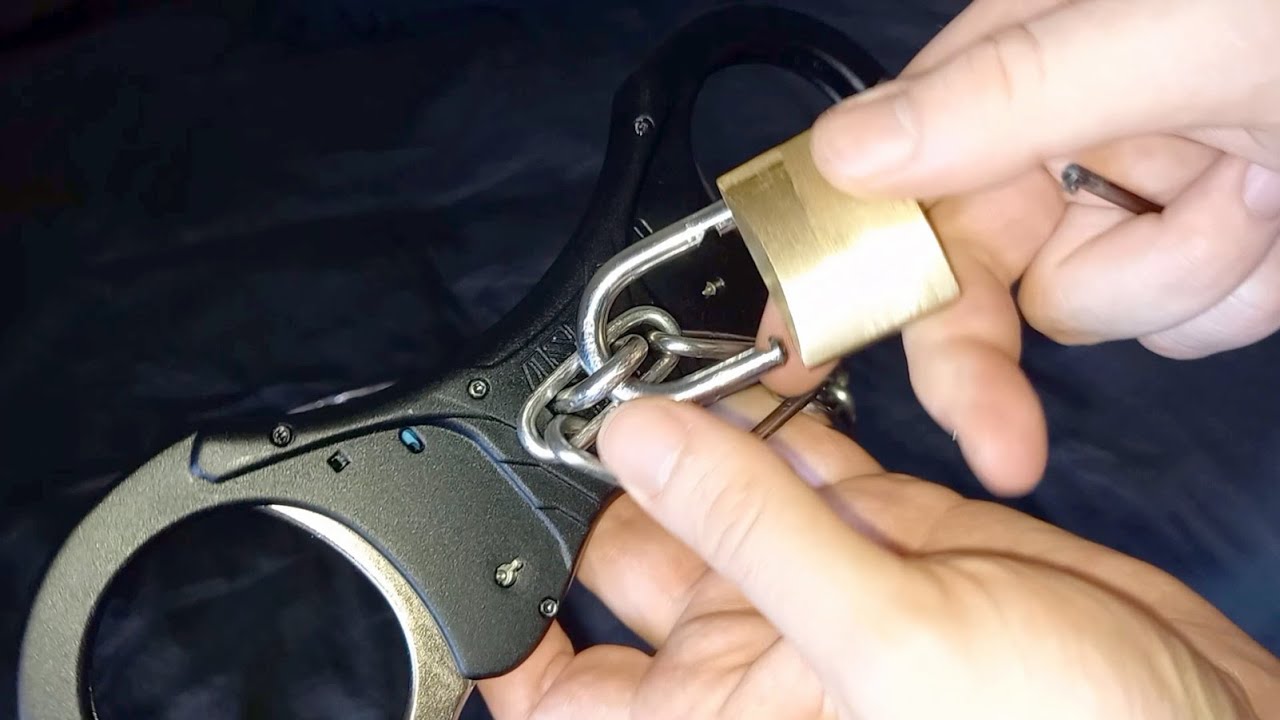
They have a rectangular hole in the middle which is for use with the official ASP Transport Kit, which consists of either a chain model or a nylon webbing belt version. These transport kits are not cheap, so I made a make-shift DIY belly chain which performs the same basic feature of securing the handcuffed hands close to the body. This helps stop a suspect or convict from strangling someone or attacking a guard or police officer etc. The official kits have options to connect them to leg irons also for added security, though it looks a bit weird with how that system works. (See official free ASP youtube videos on their transport kits to see them in action).
These handcuffs are really nice. You can put whatever security level of locks you want into them. Mine came with green European 3 pawl locking mechanisms, which I swapped around my mechanisms and put a blue set in these and moved the greens into a different pair. I love the blue because they are more secure and less common. The yellow are very basic and I am not a big fan of them. I don't know why they bother even making the basic yellow mechanism when they make the green one which is slightly better while still using standard keys.
My DIY belly chain / waist chain, consists of a 4mm thick 316 stainless steel chain with long links, a 5mm thick Dee shackle and some JB Weld MarineWeld epoxy which I put on the threading and openings of the Dee Shackle to ensure it never unscrews ever again once installed onto the chain. Before I installed the Dee Shackle, I used a hacksaw and cut off the thumb-turn area, to make it more flat. Then I mixed and appliex the epoxy and screwed the bar in place using my pliers on the exposed sliver of the thumb-turn I left. Once fully cured in 24 hours, this epoxy is waterproof, acid proof, chemical proof. So I figured that would be more than adequate. I might keep this belly chain or one day I might sell it, so I wanted it to be a decent job.
One last thing to mention, I did have to do some small amount of grinding on the outer edges of the tall parts of the Dee Shackle and I had to use a dead-blow hammer outside to bend the shackle to allow it to slide in the transport hole on the cuffs and then to straighten it, I clamped it in a vice and used a pipe wrench to bend it back into being a nice even shape, while still fitting into the cuff's transport hole. It took a little bit of effort, but it was not hard to achieve.
The links to the exact Dee Shackle and chain that I used are below:
Chain: https://www.ebay.co.uk/itm/164917122044
Dee Shackle: https://www.ebay.co.uk/itm/3735316615...
Anyway, I hope you found this video useful or interesting, please like, subscribe, share and I will see you next time :D
Enjoy
No comments:
Post a Comment